Cards
A card is one piece of work on a board. This page covers making cards, reading them on the board, opening them, and moving them around. The keys a card holds are in Card.
Add a card
Section titled “Add a card”Choose File ▸ New Card (⌘N). A new card appears with its title ready to type. Type the title and press Return.
Where it lands depends on what is selected:
- With a card selected, the new card goes in that card’s lane, right after it.
- With a lane selected, the card goes at the bottom of that lane.
- With nothing selected, it goes in the lane you used last, or the first lane.
Other ways to add a card:
- Hover over a lane and click the round + that floats at its bottom-right corner. In a lane grouped into sections, it sits at the corner of the group you hover. A lane that locks its content has no +.
- Double-click empty space in a lane.
- Select a lane and press Return.
- Choose New Card from the lane menu.
Read a card’s face
Section titled “Read a card’s face”Each card on the board shows what matters at a glance.
- The title, with the card’s icon and tint.
- A preview of the first lines of the body, when it is switched on.
- Its labels.
- A Due chip. It turns amber when the date is today or close, and red when it is past.
- A comment count, with the age of the latest comment.
- A mark when the card is waiting on you. See Comments.
Choose View ▸ Card Body to set how many lines of the body show: None, or 2 to 5 Lines.
Hover over a card or list row whose title is cut off to read the full title in a tooltip.
Open a card window
Section titled “Open a card window”Double-click a card, or select it and press ⌘↩ (Board ▸ Open Card). The card opens in its own window.
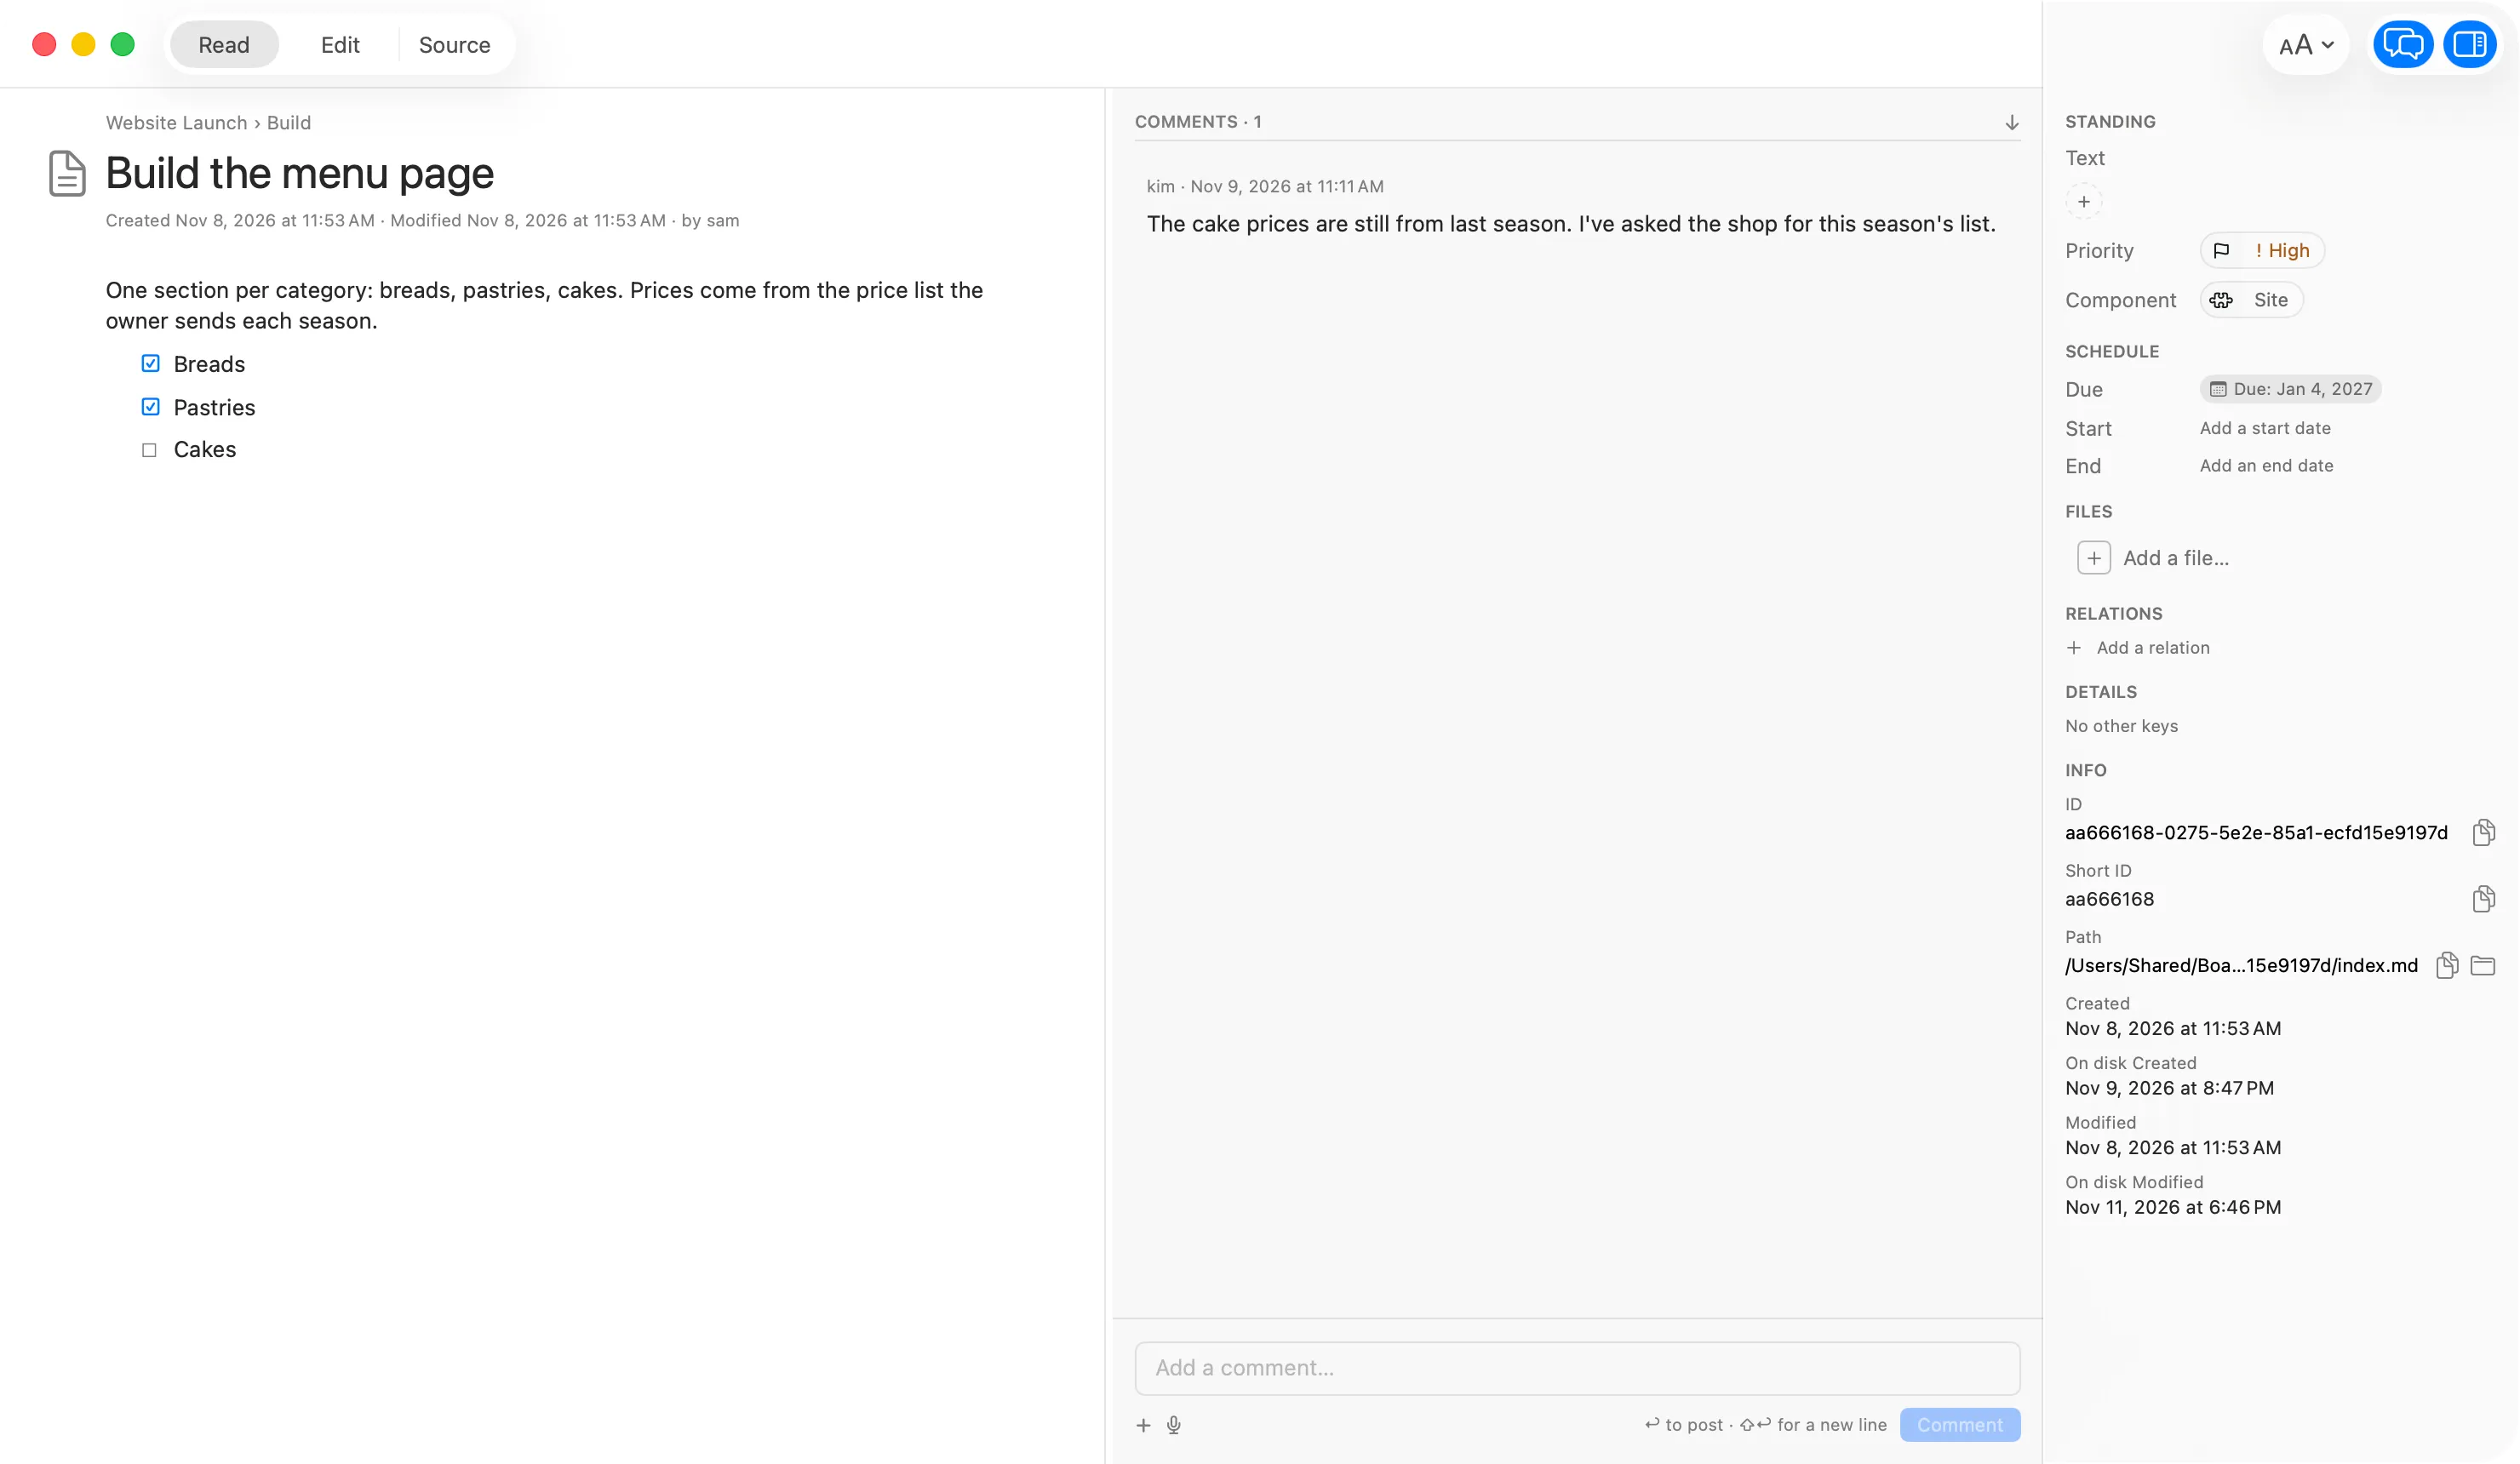
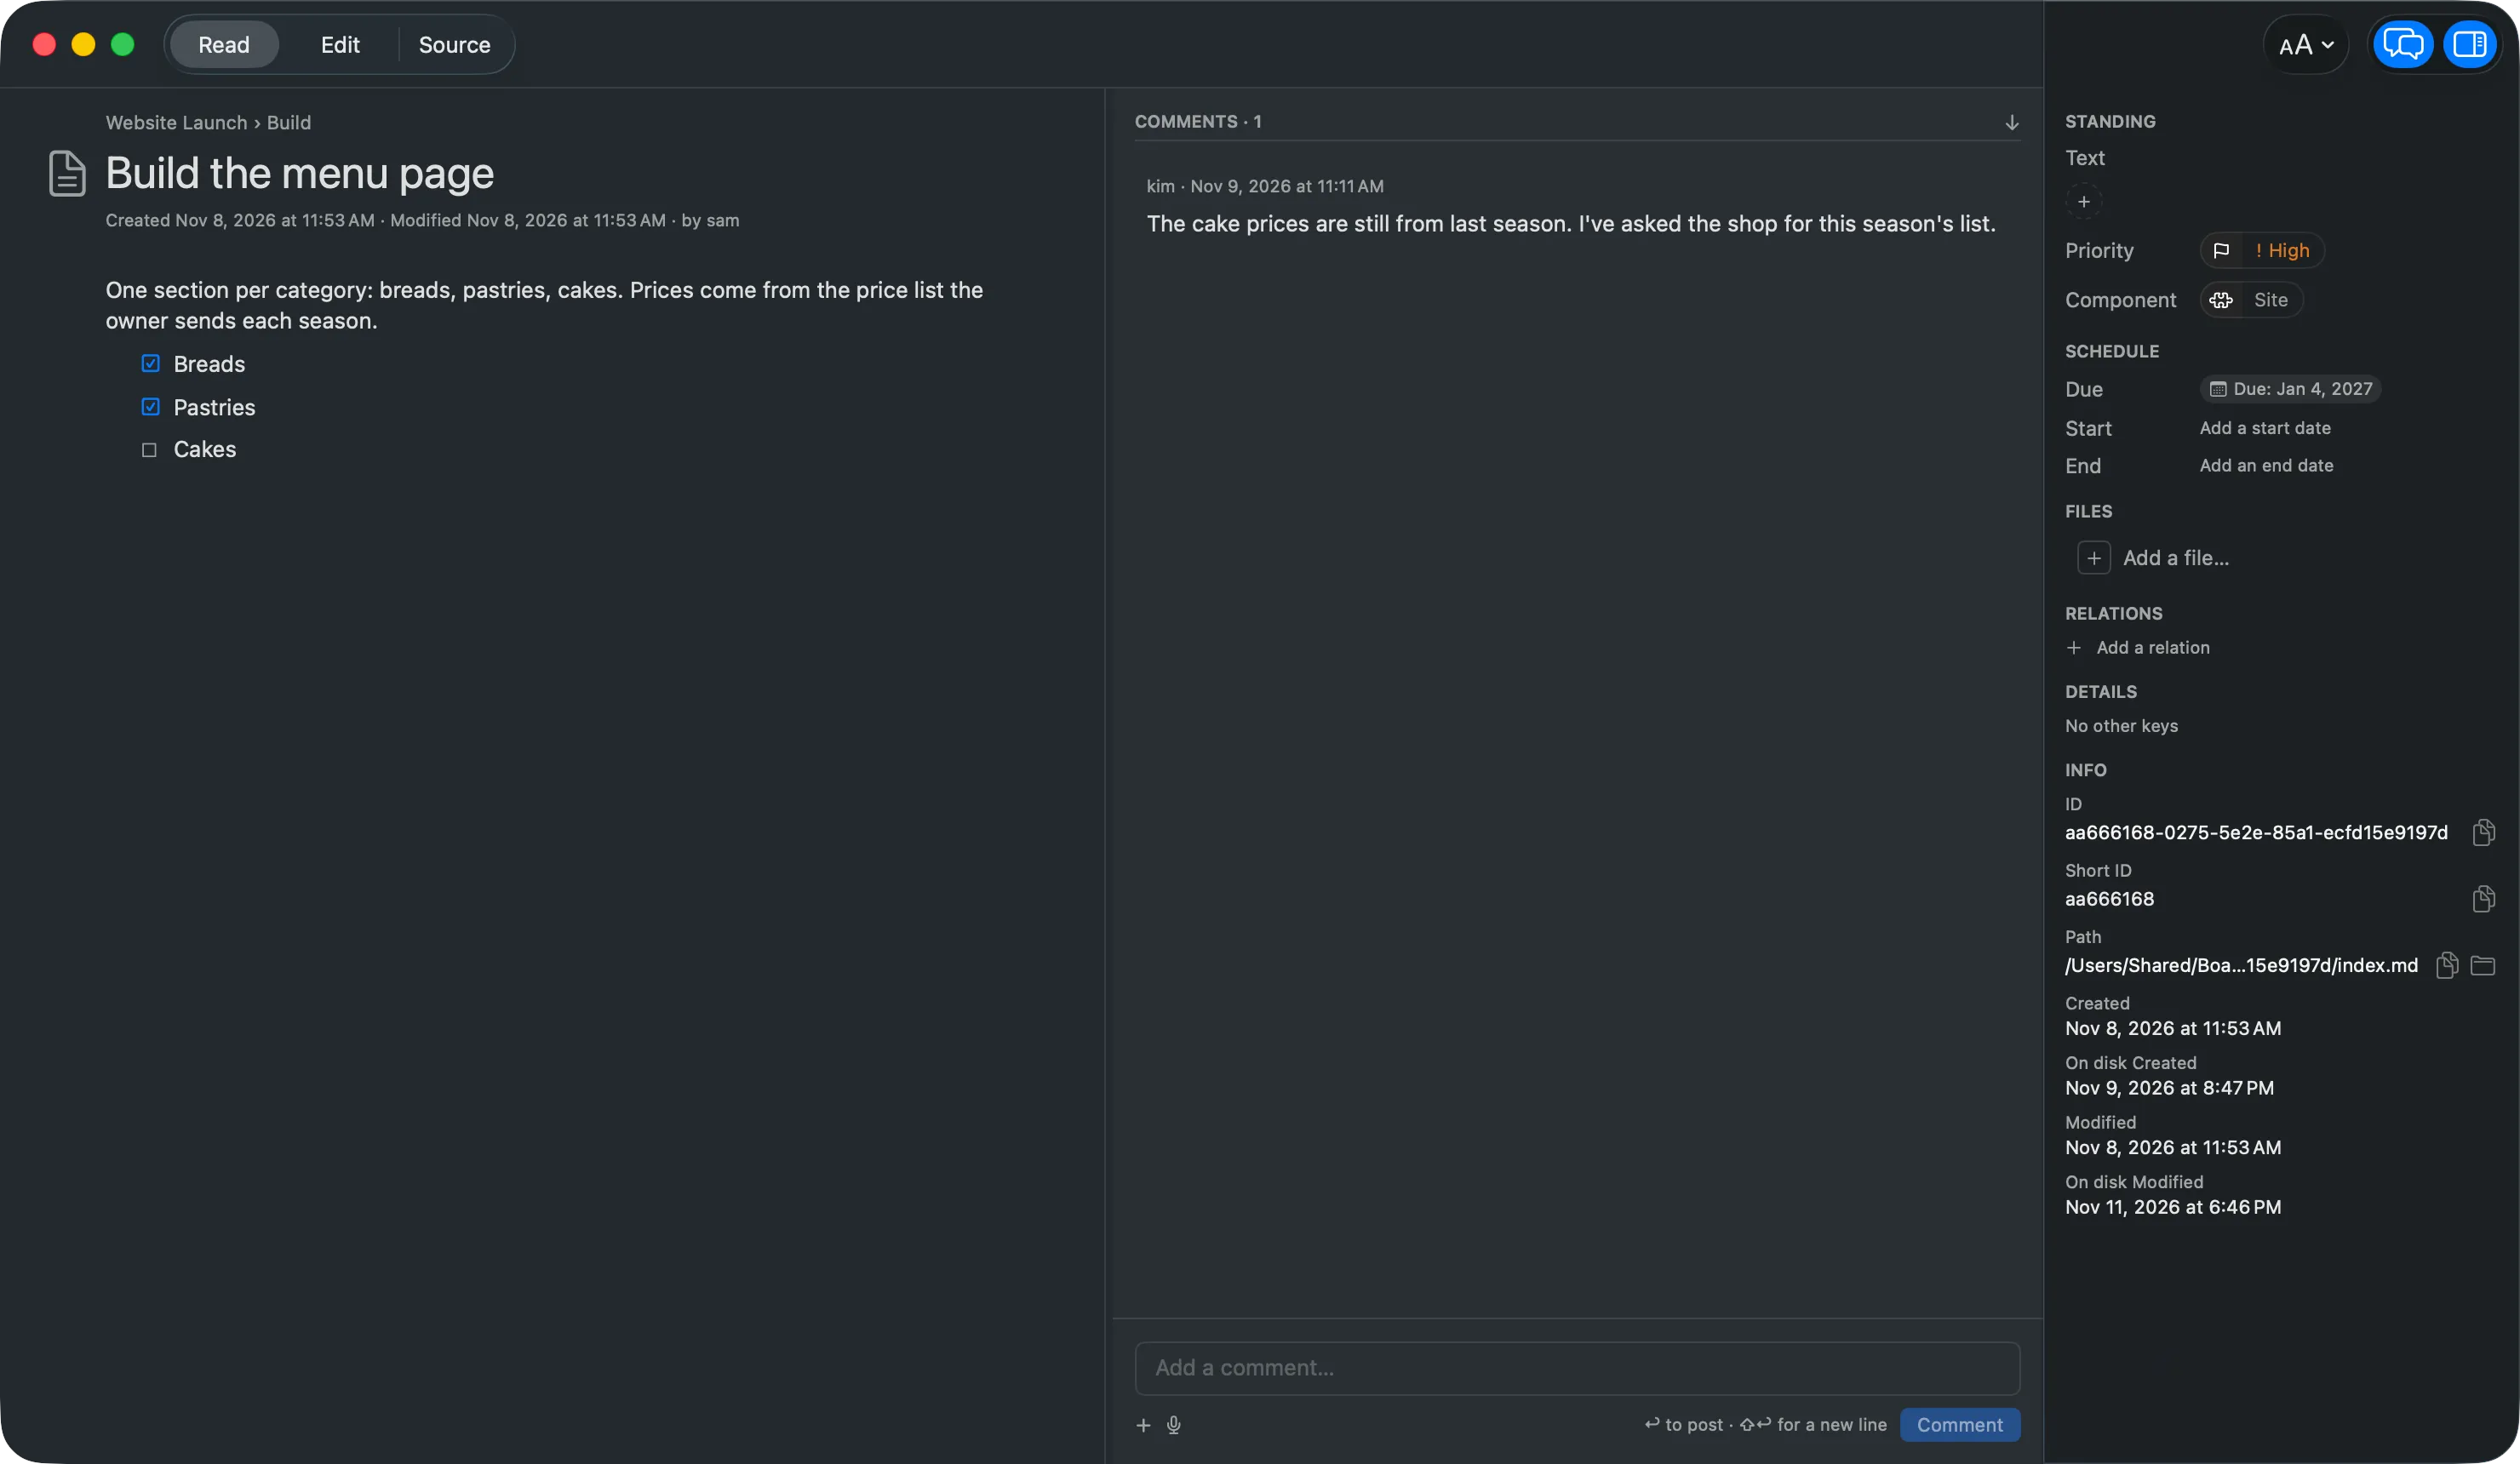
The window has a title, then the body. Two panes sit beside it. Show or hide them from the View menu:
- Show Comments (⌥⌘M), the thread. See Comments.
- Show Inspector (⌥⌘I), the card’s details.
Its main sections are Standing (the label kinds), Schedule (the Due date), Files, Relations, Details and Info. Info gives the card’s ID, Short ID and Path with a copy button for each, plus its created and modified times.
The toolbar adds Mode, Undo, Redo, Text Size, Add Attachment…, Reveal in Finder and Open in Editor.
Relate a card to another
Section titled “Relate a card to another”A relation says how this card connects to another card, lane or board, such as “depends on” or “traces to”. The inspector’s Relations section lists them. How a relation is stored is in Relation.
- Relations are grouped under their type. The heading is the type with hyphens and underscores turned into spaces and a capital first letter, so
traces-toreads “Traces to”. Types that differ only in those ways share one heading. Relations that other cards state about this one are listed separately under Incoming. - Click a relation to go to the card it names.
- A relation whose target cannot be found shows the link as written. A relation marked suspect has a mark. Hover over it, or open it, to see why.
To add a relation:
- Open the card window and show the inspector (⌥⌘I).
- Under Relations, click Add a relation.
- Search for the target card or lane under Target.
- Type the Type, such as
traces-to, and a Rationale (optional). - Click Add.
Right-click one of the card’s own relations and choose Edit Relation… or Delete Relation. Both can be undone. Editing changes only the type and rationale. To change the target, delete the relation and add it again. Incoming relations belong to the other card, so you change them there. A card in a lane that locks its content keeps its relations as they are.
Edit the body
Section titled “Edit the body”The card window has three modes, in the View menu and the toolbar Mode control:
- Read shows the body as rendered Markdown.
- Edit (⌘E) lets you type. Changes save as you go.
- Source (⌥⌘E) shows the whole file, including the settings at the top.
A card with an empty body opens in Edit. ⌘F searches the body, and View ▸ Text Size sets the reading size: Small, Regular, Large or Extra Large.
Type @ in the body to mention someone. See Comments.
Set a due date
Section titled “Set a due date”- Open the card window and show the inspector (⌥⌘I).
- Under Schedule, click Add due date.
- Pick a day.
To remove it, click Clear Due Date. A due date is a day, not a time.
How many days ahead counts as due soon is set in Board Settings under Due soon, with a default for all boards in Settings.
Move a card
Section titled “Move a card”- Drag it to a new place in the lane, or into another lane.
- Select it and choose Move Up (⌥⌘↑) or Move Down (⌥⌘↓) to reorder it within its lane.
- Choose Move Card Left or Move Card Right in the Board menu to move it to the next lane.
- Right-click the card, choose Move to, then pick a lane.
Select several cards first to move them together.
Copy a card
Section titled “Copy a card”- Hold Option while you drag, to drop a copy.
- Or use Copy (⌘C) and Paste (⌘V) in the Edit menu. Paste puts the copy after the selected card.
- Copy in one board and paste in another to bring a card across.
Copy As in the card menu, or in the Board menu, puts a reference on the clipboard: Lanework Link (⇧⌘C), File Path or Short Reference. Hold Option to copy the Full Lanework Link (⌥⇧⌘C) instead of the short one. Short links open only in this version of Lanework or later. What a link holds is in Lanework links.
Peek with Quick View
Section titled “Peek with Quick View”Select a card and press Space. A panel shows the card without opening it. It follows your selection as you move with the arrow keys. Press Space again to close it.
- Quick View Body (⌘1) and Quick View Comments (⌘2), in the View menu, switch tabs.
- Press ⌘↩ to open the card window instead.
Quick View is in the View menu too. It never changes the card.
Open a card in an editor
Section titled “Open a card in an editor”Choose Open in Editor from the card window’s toolbar or the File menu. The card’s folder opens in Lanework’s built-in editor. Hold Option to open it in your default editor instead.
Delete a card
Section titled “Delete a card”Select it and choose Send to Trash (⌘⌫). In the card window, choose File ▸ Delete Card. Restoring a card is in Boards.